Sunday, May 27, 2012

Water Bead Ice Eggs

Thank you for all of the positive feed back on our Ice Eggs activity, they've been never endingly popular at our house despite winter setting in!
We've been experimenting each week with new items inside our balloons and this week we tried out water beads. We've used them inside balloons before for our Texture Balloons activity but have never tried them inside Ice Eggs, and the results were very pretty.
The girls had a lot of fun melting their eggs with water and having a game of Ice Bowling, and of course, smashing them into itty bitty pieces ;D

WE USED:

* top cut from a plastic water bottle
(you could also use a wide mouth funnel if you have one)
* balloons
* water beads (hydrated)
* freezer
* recycled bottles and tins
(if you want to play Ice Bowling)


We hydrated some water beads overnight and cut the top from a water bottle to use as a balloon funnel.

The balloons stretch and fit easily over the water bottle spout making it easy for the girls to hold and put the water beads in themselves.

Bubble filling her balloon with beads.

Balloons filled with water beads.

Next we added water to make our Ice Eggs. I attached the balloons to the tap faucet and the girls filled them as big as they liked. Once they were ready I tied them off.

Then just as last time we put our balloons into the freezer.
One thing we always do when making Ice Eggs is put the water balloons inside a container or bag, just in case there is a breakage!

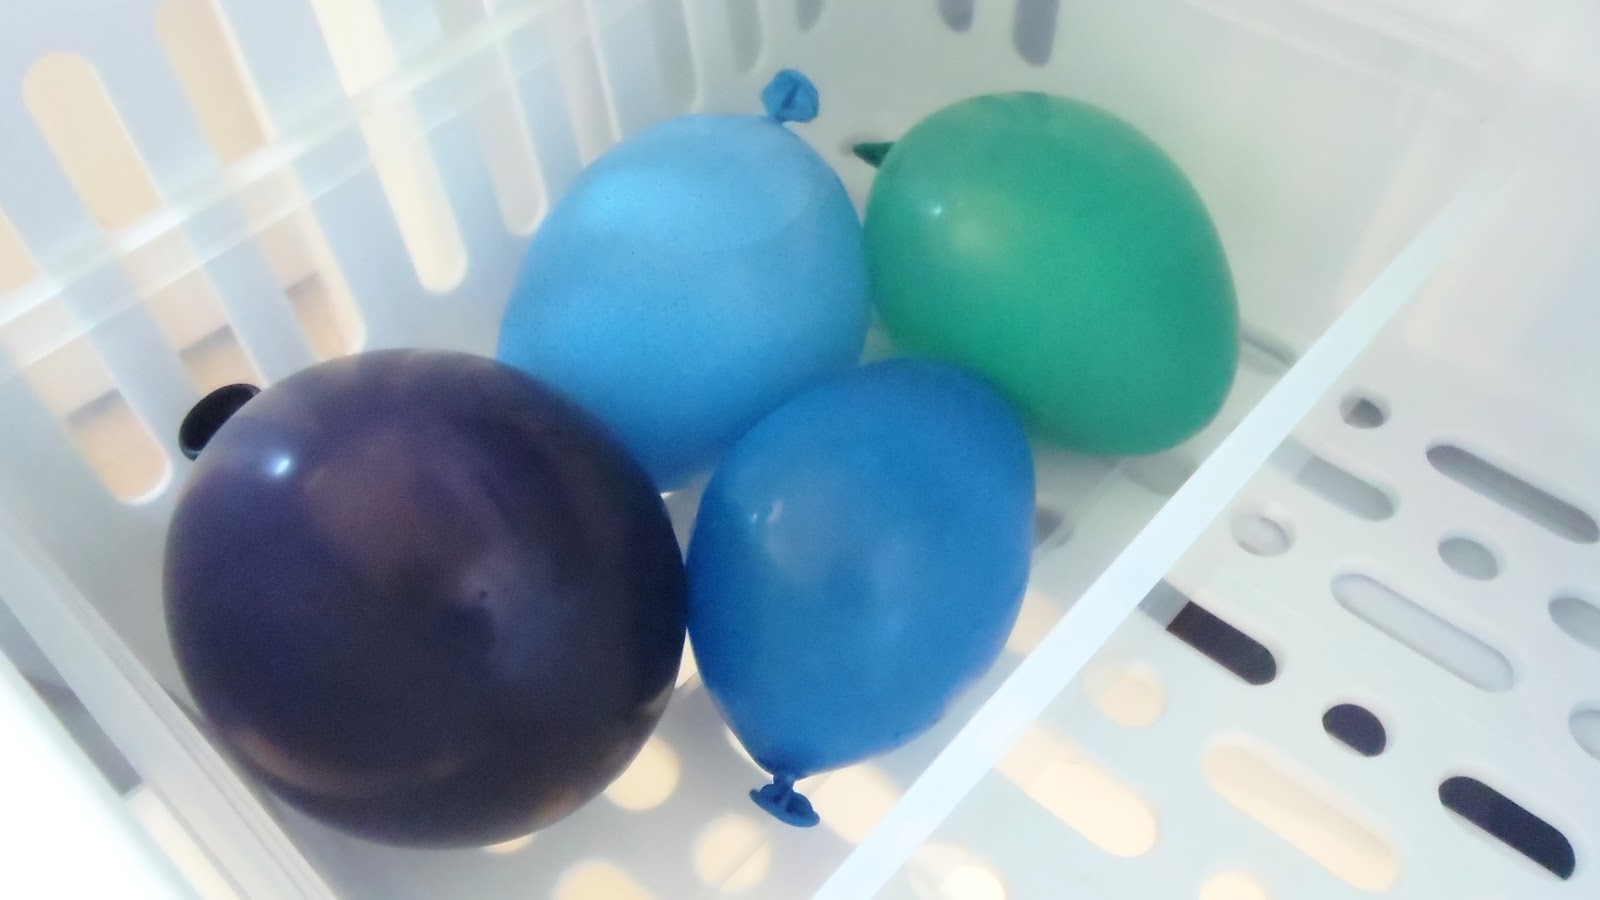
The Water Bead Ice Eggs after freezing overnight.


Bubble setting up some things from the recycling bin for Ice Bowling (we didn't have enough empty milk bottles!).


Shared on:
Fit Kids Clubhouse


Saturday, May 19, 2012

Coloured Sand Ice Cream Shop - Pretend Play

We often incorporate food colouring in the sandpit or at the beach (see our coloured sandcastle post here) but today we used coloured sand for some pretend play.
This activity was so easy to create and the girls enjoyed hours of fun with it!

WE USED:

* sand pit
* food colouring
* bowls and spoons
* water
The coloured sand was made by putting scoops of sandpit sand in a bowl, adding food colouring and then mixing in water until we had the consistency we were after.

The girls chose their own ice cream 'flavours' for their shop.

We made a sign to go on the front of the sandpit. I adore the names the girls came up with for their ice creams (Love Hearty Mint needs to be trademarked I think ;D).


Yum, one blueberry sand cone.

Not only was this fun but the girls ended up getting very creative with their concoctions and imaginary play scenes, using conker nuts and leaves as money and using other moulds from the sandpit to make cakes and 'desserts'.
There was a lot of great fine motor practice in there for Squeak as well with all that scooping!


Inside Out Party Hats


We have a lot of cardboard party hats at our house. The girls have a pile of them in their dress up cupboard which get hauled out every second day for an 'un-birthday party' or some kind of picnic.
Some of them were looking a bit worse for wear so we spent yesterday afternoon personalising them and giving them a new look. 

WE USED:

* party hats
(we buy them from discount shops for around $1 for 10)
* textas, stickers, glitter etc... for decorating
* sticky tape


First we unfolded our party hats by folding and slipping the tabs out

I then rolled them a bit to get them flat so the girls could decorate them.

The girls got busy with stickers, stamps and textas.

Once they were finished we reassembled the hats inside out so their designs were now on the outside and secured them with the tabs and a bit of tape.

Ready to party :)

Wednesday, May 2, 2012

Mothers Day Badges


We're a bit late with our Mothers Day cards this year, poor little Bubble and Squeak have both had consecutive bouts of a stomach virus, so haven't been in much of a crafting mood.
We managed to make these cute and easy little Mothers Day badges to send interstate to their Grandmas this year, inside the Pom Pom Flower Cards we made earlier in the week.

WE USED:
* scrap cardboard (thin)
* markers/textas
* A4 laminator and pouches
* safety pin
* good quality sticky tape
* cookie cutters
* scissors


We started by tracing some shapes onto our card using a pen and cookie cutters.

The girls then drew whatever picture they liked inside the shapes. 
Bubble knew they were for her Grandmothers so drew pictures of them with herself ad Squeak. Squeak is a bit little to grasp the idea of Mothers Day but really liked drawing with every colour texta she could find :D 

Once their little masterpieces were finished we cut them out and then laminated them using a standard laminator and pouch and cut them out again.

We attached a safety pin to the back of each one by first threading a length of good quality tape through the pin and sticking it down. Then we put two more lengths of tape horizontally at each end of the first piece of tape (to form a capital 'I' shape).
This is really effective for holding the pin to the back of the badge, we made some of these for the girls birthdays recently and even when I accidentally put them through the wash they didn't come unstuck.

Adorable little Mothers Day badges for a proud Mum (or Grandma, Aunty, cousin...) to wear.


We attached our badges to the inside of our Mothers Day cards (see how we made them HERE) using looped tape (double sided tape would also work.
Sorry about the bit at the bottom, that's just where I've blurred Bubble's real name ;)

Here is a free 6x4 print for the inside of a Mothers Day Badge card.
I've reworded it slightly from our version since everyone has a different name for the special women they celebrate on Mothers Day.


Mothers Day Cards - Pompom and Straw Painted Flowers

These Mothers Day cards were very easy and a lot of fun to make. The girls really enjoyed both the straw and pom pom painting and both activities were a great fine motor work out.

WE USED:

* thick drinking straws
* green paint mixed with a little water
* small jar
* coloured paint in a tray
* pompoms
* paper
First we mixed our green paint with a little water to thin it slightly.
I cut our straws in half to make handling them a bit easier for Squeak, but you don't need to.

 
We poured blobs of paint onto the paper and the girls blew it around using their straws to create the leaves of our flowers.
I actually thought they would blow straight lines (for stems) but love the look of the blobby green shapes we ended up with even better. 

 
Once they'd had enough of the green paint we got out some trays and they chose their flower colours.
We then used different sized pompoms dipped in paint to create our flowers.
They girls really loved this part, Bubble told me it felt 'squishy and squashy' and Squeak ended up making an absolute mountain of pompom paint pictures.


I love the end result, so pretty and abstract.

 
 Once they were dry we glued our pompom and straw painted flowers to the front of some scrap cardboard to make our Mothers Day cards.
Check out the extra special something we added in this post HERE.